Overview
The main goal of this project was to implement a rasterizer (a program that takes an input image and converts it into pixels for output on a screen or display). Simple triangle rasterization can often lead to aliasing within high frequency images (images with fast-changing pixel values). To combat this, I implemented supersampling, an anti-aliasing techniques that samples multiple times within 1 pixel and averages the subpixels' colors. I also implemented hierarchical transforms, a method of representing polygon transformations. Finally, I implemented texture mapping which applies a 2D texture image to a 3D object along with its antialiasing techniques (bilinear level sampling, nearest neighbor level sampling, etc.)
Section I: Rasterization
Part 1: Rasterizing single-color triangles
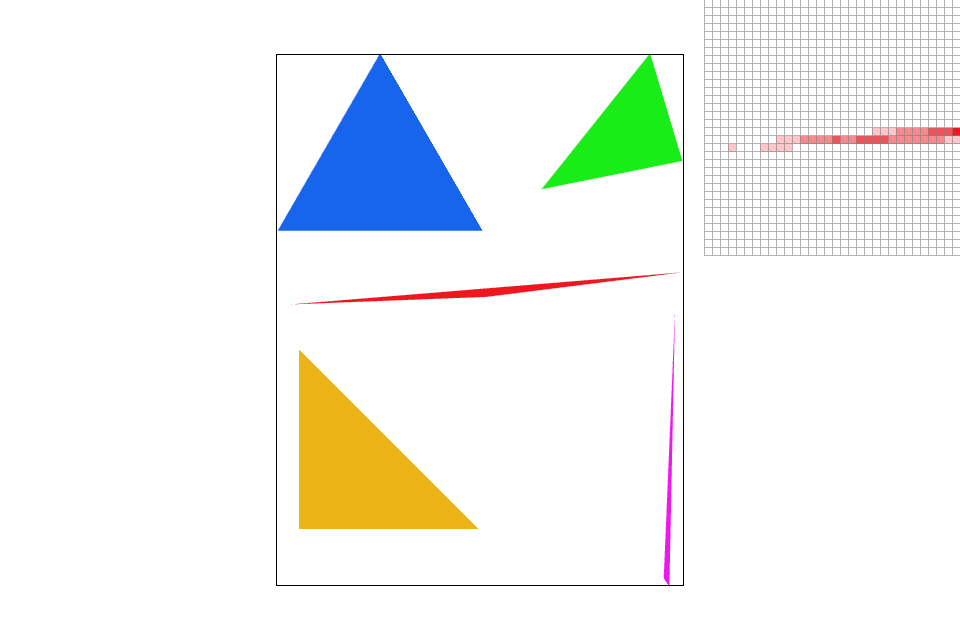
The triangle rasterization method is given the three vertices of a triangle and the triangle’s color. My method calculates a bounding box around the triangle by finding the maximum and minimum (x, y) values of the three vertices. This implementation essentially “draws” a box around the triangle so that only a small subset of pixels within the overall image’s pixels have to be checked (as the majority of the pixels in the image do not fall within the given triangle).
I looped through every pixel in the bounding box, testing if the center of the pixel is within the triangle. In order to determine whether or not a pixel’s center is within the triangle, I implemented the Point-in-Triangle test discussed in lecture which computes the line equations from three pairs of vertices . If the line equation yields a number greater than zero, then the point exists inside the edge. All else are either on the edge (= 0) or outside the triangle (< 0).
If the pixel’s center is within the triangle, I set sample buffer’s corresponding pixel to the given color. If the pixel’s center is outside the triangle, we iterate to the next pixel. This algorithm is no worse than the algorithm that calculates a bounding box around a triangle because it is the same algorithm. By calculating a bounding box and only checking the pixels within the box, I am able to disregard the majority of irrelevant pixels.
|
Part 2: Antialiasing triangles
Supersampling is an antialiasing technique that sets the pixel value to the average of multiple subpixel samples. The issue with sampling only once per pixel is that a pixel space in an image often contains more than one color. However, if we only sample once in each pixel, the screen pixel can only take on one of the pixel values. This can cause the rasterized image to contain “jaggies” along high frequency areas like edges. Since supersampling samples multiple times within a single pixel, and sets the pixel to the average of all the colors from the subpixels, pixel's are able to more closely represent edges. The rasterized image will show a better gradient of colors along high frequency areas (decreasing the appearance of jaggies). This method is more able to represent a pixel space’s true value.
For a high level overview of my method: I first rasterize the image then average the subpixels to set the final pixel's color. To do so, I calculate the number of subpixels that I need to sample from (this would be the square root of the sample rate). Then, for each pixel within the bounding box, I test the center of each of its subpixels to see if the center is within the triangle. If a subpixel is found to be within the triangle, I set the samplebuffer’s pixel value to its corresponding color. After each pixel's subpixels has been tested/filled, the program calls another method that sets the pixel value to the calculated average of all the subpixel colors (colors are added up then divided by the total number of samples).

|

|
|
Extra Credit: I implemented a different anti-aliasing technique: jittered sampling ( J ). This sampling method randomly samples within a subpixel.
|

|
Part 3: Transforms
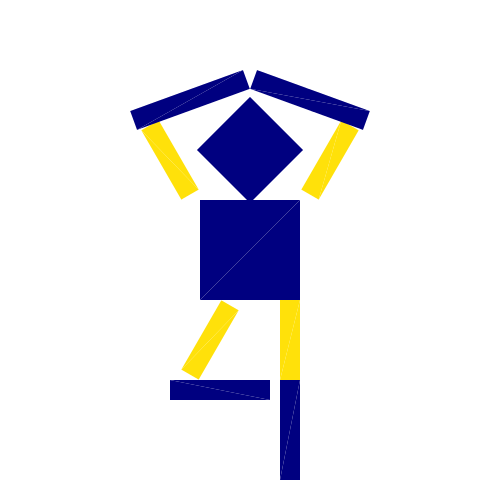
In the screenshot, cubeman is twirling like a ballerina. I lengthened cubeman’s limbs and increased the size of his head. I also made cubeman a potential mascot for Cal by changing his colors to blue and gold.
For my transformations: I rotated all but cubeman’s right leg limb, torso, and head. Cubeman’s right and left arms are reflections of each other so the rotations and translations are the negative of the opposing sides’ value.
|
Extra Credit: I added the "jitter" key to the GUI. By pressing "J", the user can decide if they want to use jitter sampling or not.

|
|
Section II: Sampling
Part 4: Barycentric coordinates
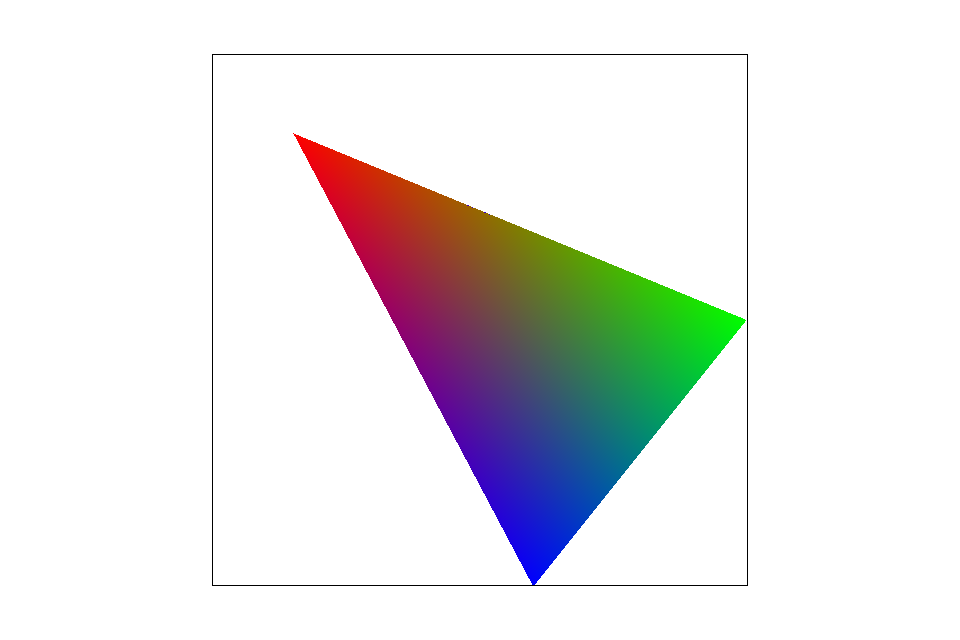
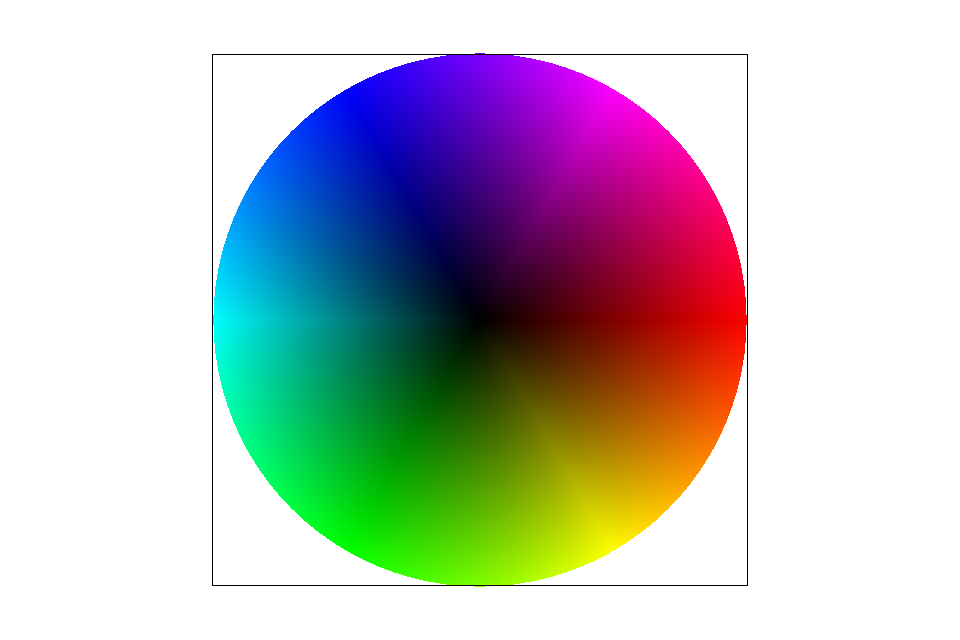
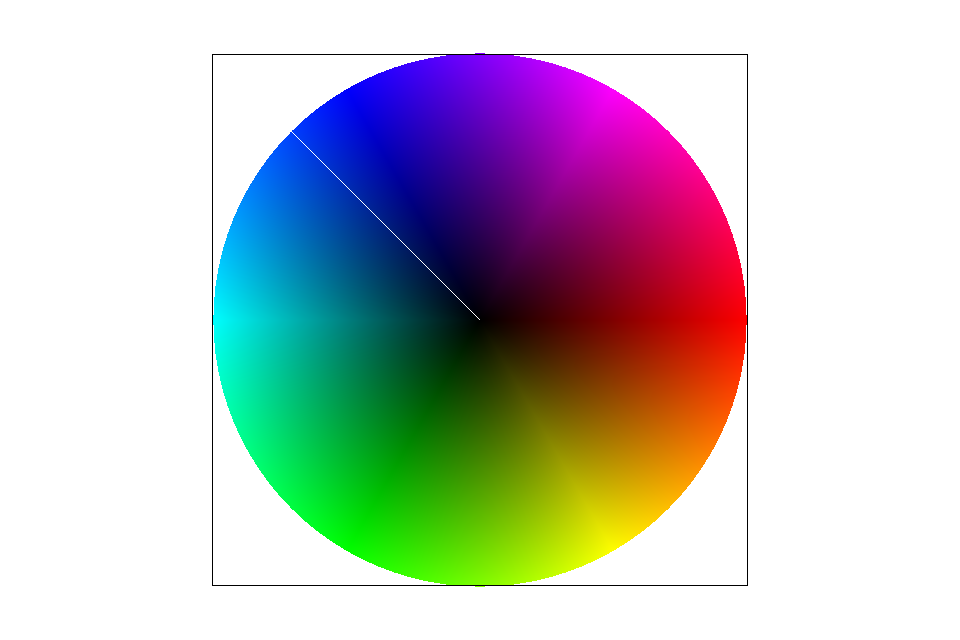
Barycentric coordinates is the coordinate system for triangles (where (x,y) in the standard 2D coordinate system is translated into the barycentric coordinate system (alpha, beta, gamma)). In the triangle on the right, a subpixel's barycentric coordinates may very well land on some area between the red vertex, green vertex and blue vertex. Knowing the colors of the 3 vertices, we can use our alpha, beta, gamma values to get a weighted average and find any in-triangle subpixel's color.
In the program, I was given a triangle and its vertices with known colors. I am then able to determine the subpixel’s color as an interpolation of the three colors. First, I translate the subpixel’s (x,y) values into barycentric coordinates (alpha, beta, gamma) using the proportional areas representation of barycentric coordinates to calculate alpha, beta and gamma. Finally, I interpolate the known colors of the triangle vertices, multiplying alpha against the first vertex s color, beta against the second vertex's color and gamma against the third vertex's color. The final returned color is set as the subpixel’s color value.
|
My Mistakes:
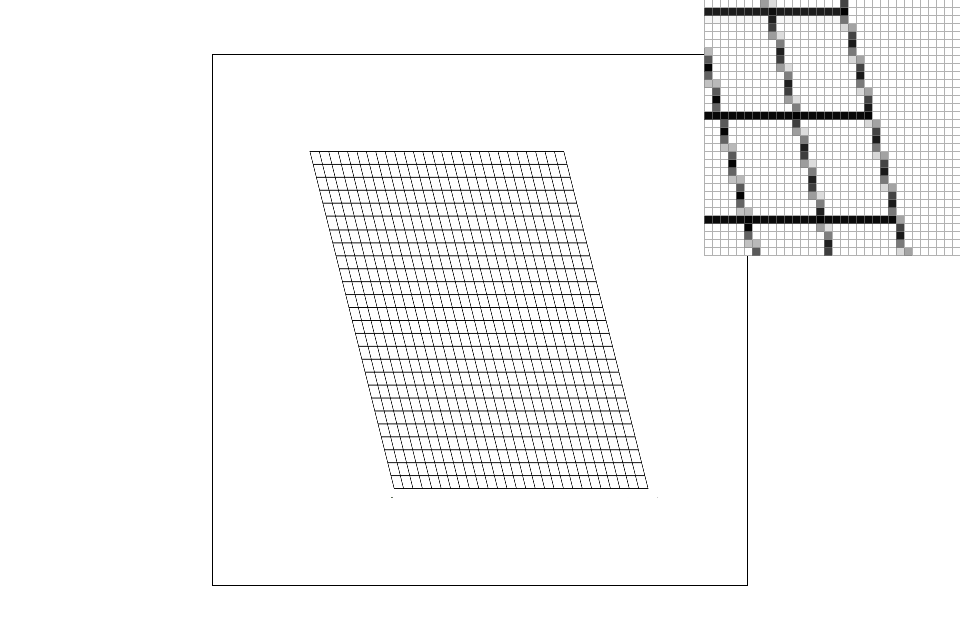
Part 5: "Pixel sampling" for texture mapping
Pixel sampling allows for us to map a texture to an image (see: texture filtering). This is a computationally difficult operation because a pixel’s space doesn’t necessarily map 1:1 to a texture space as different pixels may have differently sized texture footprints. In order to texture a model, we need to transform the image’s (x,y) coordinates to the corresponding texture’s (u,v) coordinates and set pixel to the corresponding color.
My implementation: My method receives a triangle with a texture member. The goal is to set my pixel value to the pixel's corresponding texture color. First, I check if the triangle has an associated texture: if not, I sample as seen above. If a texture is associated, I calculate the subpixel's barycentric coordinates (alpha, beta, gamma). Now that I have the subpixel's position within the texture's triangle, I can interpolate between my barycentric coordinates and the texture triangle's corresponding vertices to get my subpixel's (u,v) position. Depending on user input, I call either nearest pixel sampling or bilinear pixel sampling to return the approximate texture color to be set as the subpixel's value. The (u,v) coordinate represents my subpixel's approximate decimal [0,1] position on a texture. In order to work with a texture's texel array, I must scale these values by multiplying (u,v) by the current texture resolution's width and height respectively.
Nearest pixel sampling sets a subpixel's value to the color of the closest texel that corresponds to our subpixel's (u,v) position. I round the scaled decimal (u,v) to get the integer index position of the closest texel (I also multiply by 4 as each texel is represented by 4 index positions: RGBA). To get to our subpixel's nearest texel neighbor, I index into the texels array. Because the texels array have a 1D representation, I first multiply the integer v value by the height of the current level's texture resolution and add the u value. With this index, I can access the texel array and get the correct R,G,B,A values. After accessing the color of our subpixel's nearest neighbor, I set the subpixel’s color to the returned texel color.
Bilinear pixel sampling samples the colors of the four closest texels to our (u,v) position and interpolates to get the average texel color at the given scaled (u,v). This texel color is then mapped to our screen pixel. In my implementation, I calculate the nearest pixel (x,y) and the 3 surrounding pixels: (x+1, y), (x, y+1), (x+1, y+1) (x, y does not represent the screen in this case). I then access the texels array to get their RGBA values and subsequently calculate the 4 corresponding colors. Next, I linearly interpolate twice to get the weighted average color of {(x,y), (x+1, y)} and {(x,y+1), (x+1,y+1)}. A final third interpolation is done to get the weighted average in the y. The weights of the first two interpolations represent the offset between the (x+1) value and the scaled u value and the last interpolation's weights are the offset between (y+1) and the scaled v value.
|

|

|

|
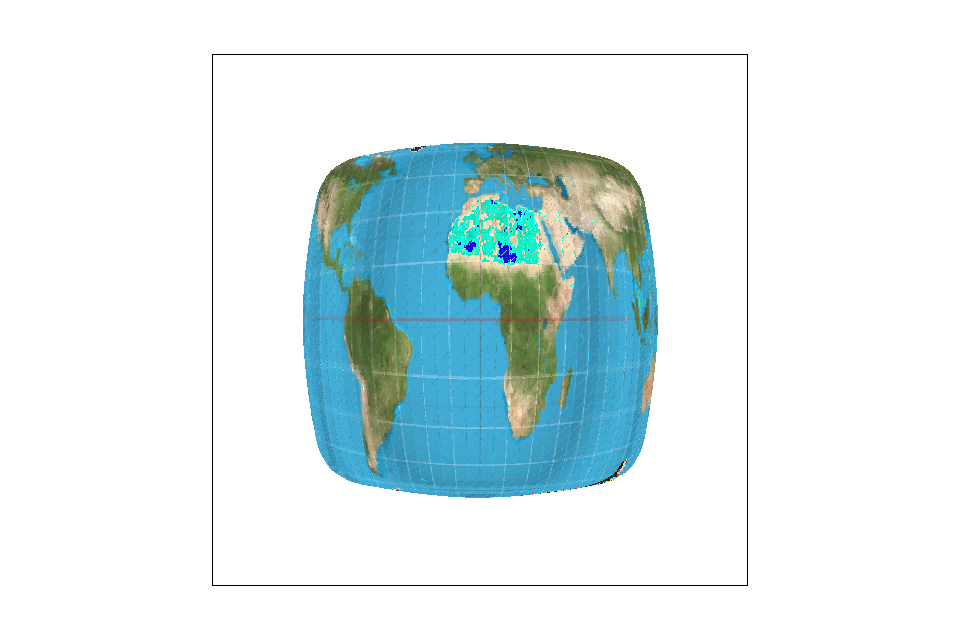
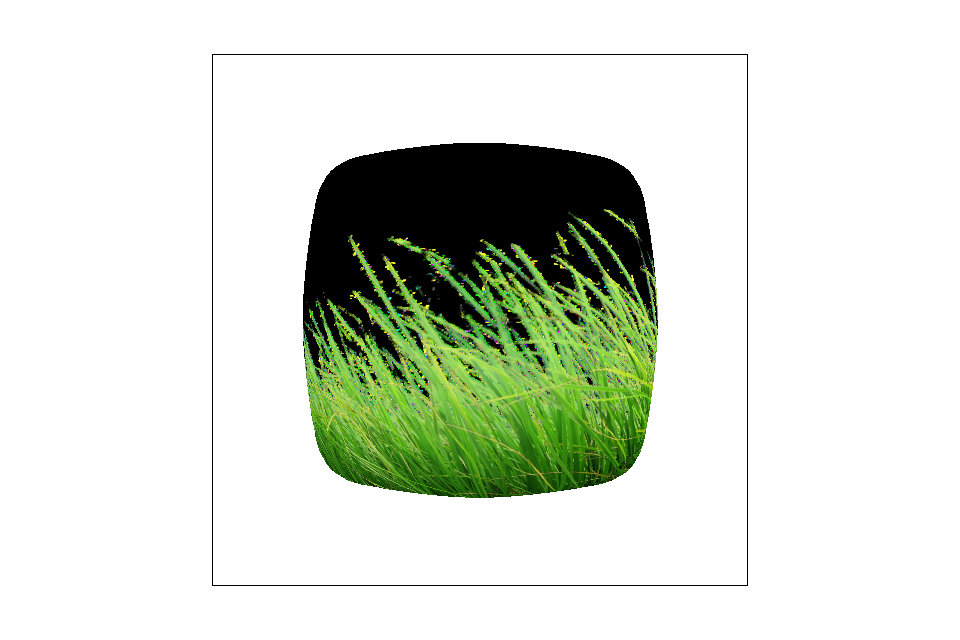
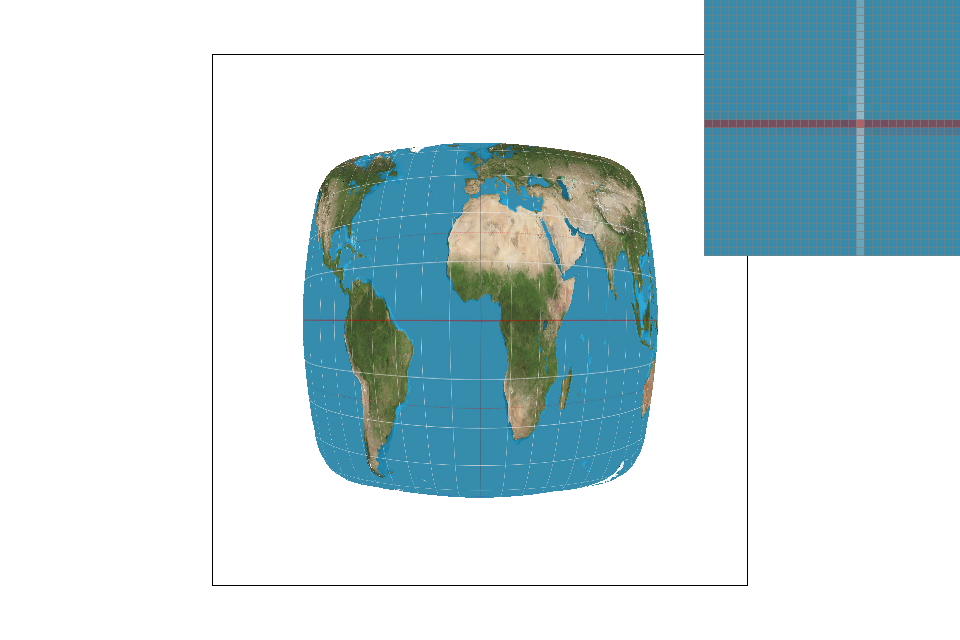
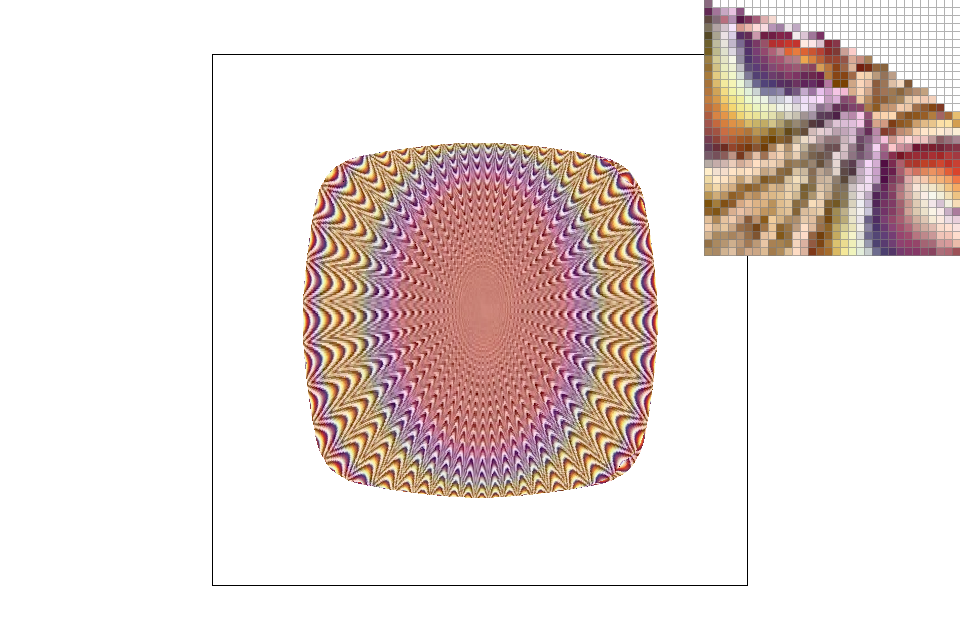
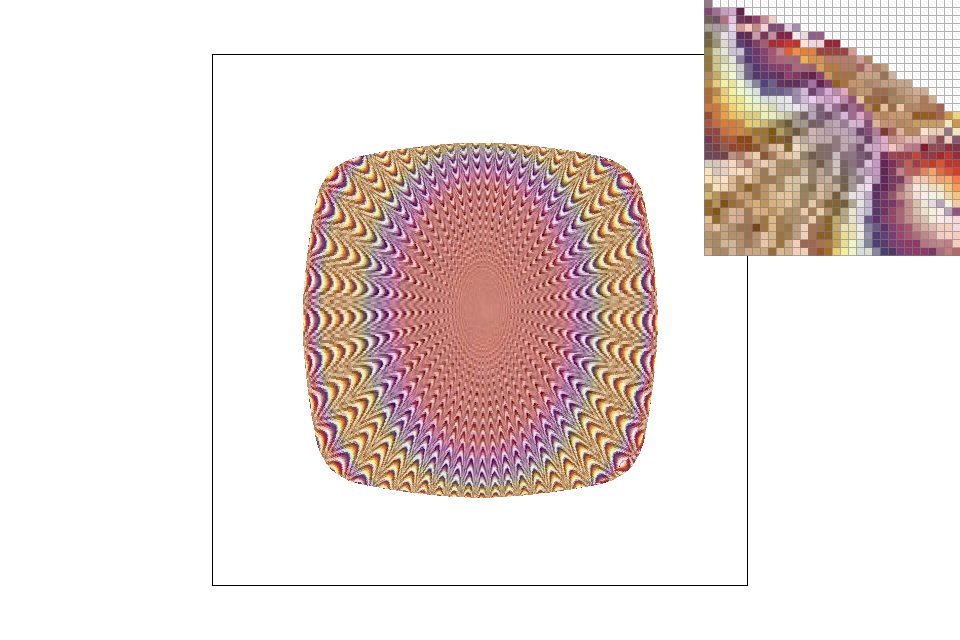
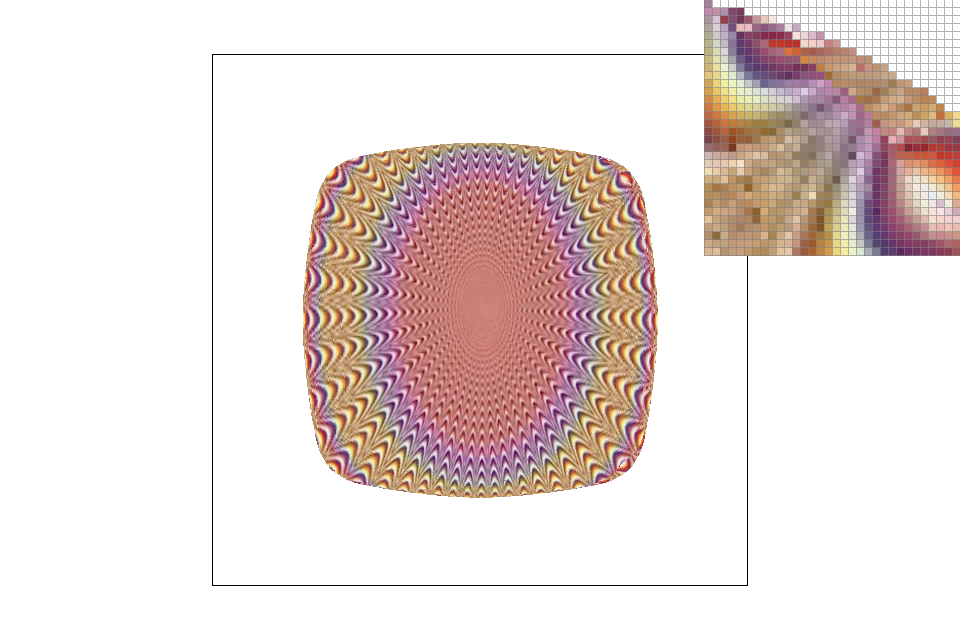
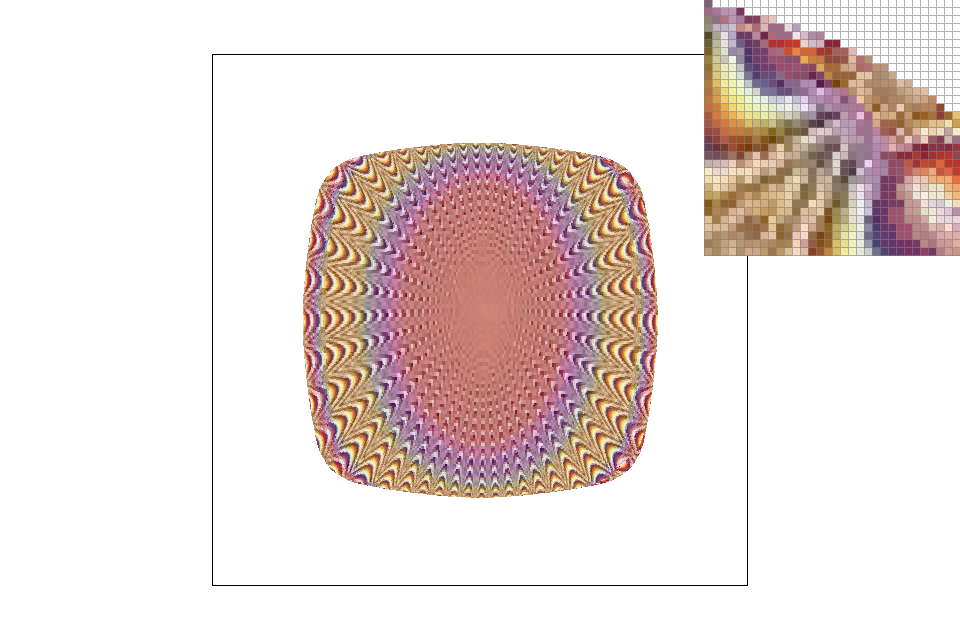
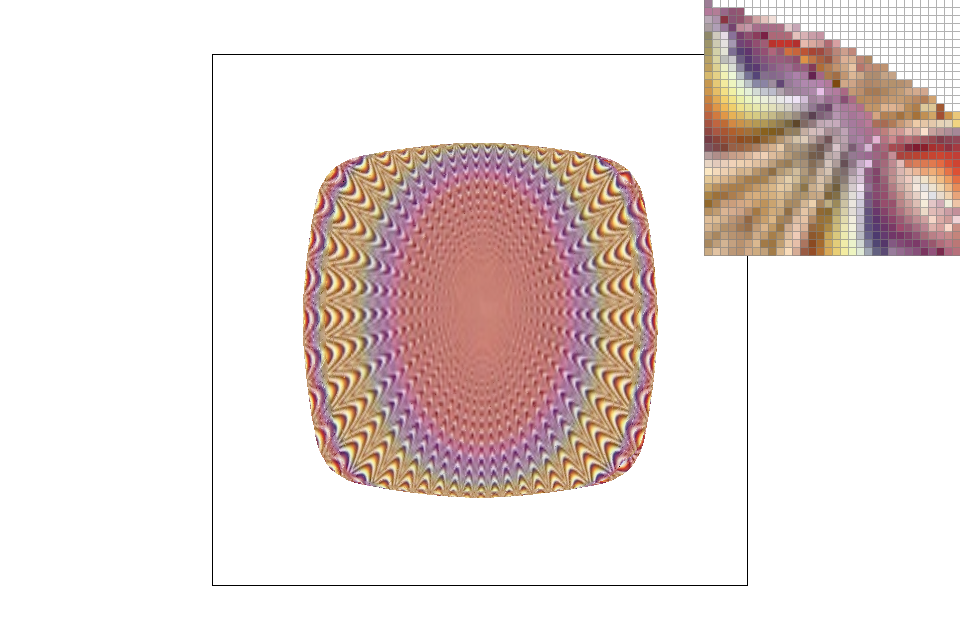
We'll see large differences in image representation when we are looking at high frequency images or images with a small amount of colors. You'll see in the pictures below that nearest neighbor's sampling algorithm misrepresents a portion of the image. By only taking one sample (the nearest neighbor), the pixels take on only one value and misses out on complete chunks. Bilinear is able to provide a more accurate image representation (albeit provide a blurrier image). Nearest neighbor is often used for large texts as it has the tendency to make the image appear sharper (and boxier)while bilinear works better for continuous images and high frequency images as it is able to average out the edges and limit the "boxy" effect.
|
|
Part 6: "Level sampling" with mipmaps for texture mapping
Level sampling is very important for mapping a 2D texture to a 3D object. Because pixels can have very different texture footprints, it’s especially important to be able to use the “correct” resolution when sampling for a pixel's value. For pixels that represent areas further away in a 3D space, the texture can be downsampled to decrease the resolution (as high resolutions may lead to aliasing). Level sampling allows us to choose the texture resolution that best corresponds to our pixel. Mipmaps are a common datastructure used to store textures and their downsampled resolutions.
For texture mapping, there were three different methods of level sampling: using level zero (the full resolution image), nearest level, and trilinear sampling which interpolated between two mipmap levels.
- Level zero: Uses the full resolution texture for each pixel. In my implementation, I always sample from the zeroth level of the mipmap which yields me the texture at full resolution. This full resolution texture's texels are used for pixel sampling.
- Nearest level: Calculates each pixel's nearest appropriate mipmap level and uses that level for the pixel's texture. In my implementation, I first calculate the pixel's true level on a continuous spectrum which yields a float. Then, I round this number to the closest integer level. I use this texture's (which may be downsampled if level > 0) texels when pixel sampling.
- Trilinear: Calculates the pixel's actual mipmap level (continuous) and interpolates between the integer level colors to return an interpolated color for each pixel. I first calculate the float level and its neighboring two integer levels (rounding up and rounding down my float level). I then pixel sample twice using either bilinear sampling or nearest neighbor sampling. Finally, I interpolate these two colors based on the difference between my float level and the rounded down level. This yields me the average pixel color. (My particular implementation did not use the trilinear helper method provided)
The level is calculated by first finding the maximum distance of our subpixel's (u,v) position and its closest neighbors. (Distance formula: square root of squared sum of the one pixel distance vectors in the x and y direction). The appropriate level is the log base 2 of the max distance.
|

|
|
|
|
|
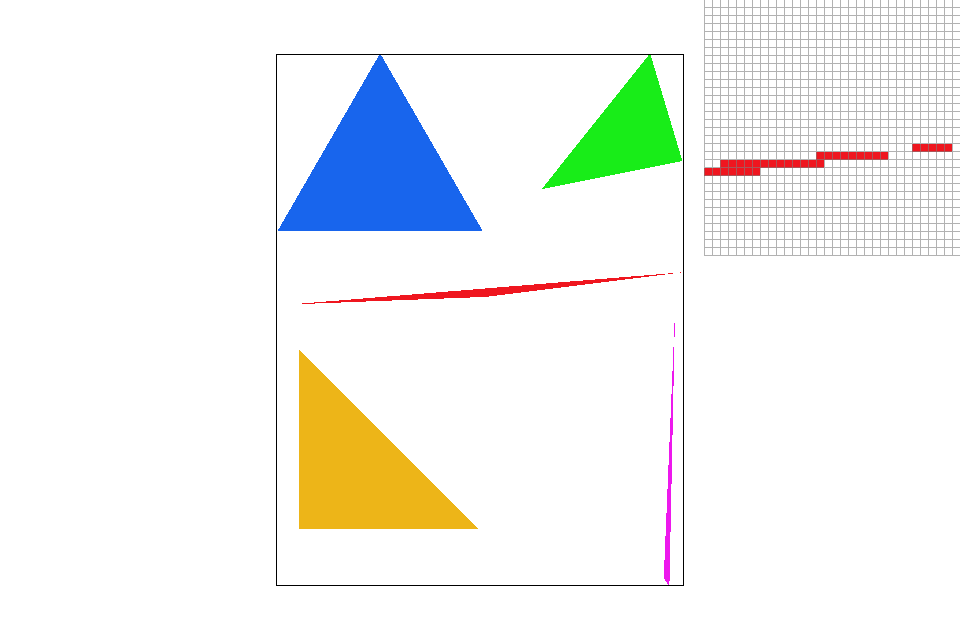
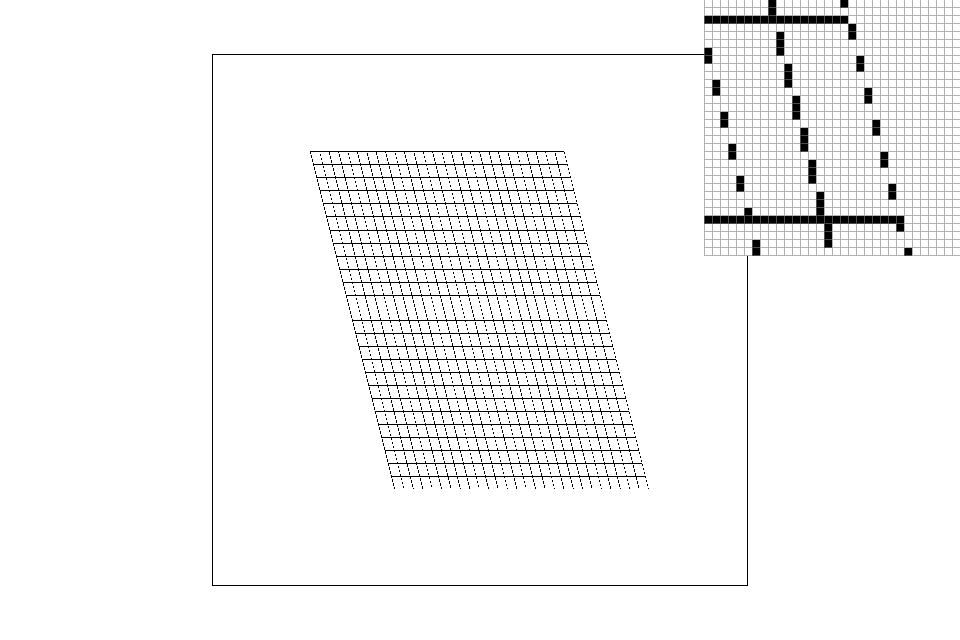
Nearest pixel sampling with level zero level sampling: Level zero sampling with nearest pixel is the quickest method that uses the least memory. It only needs to keep track of one texture resolution (level 0) and one pixel (the nearest neighbor). However, its image representation is terrible for high frequency images with limited colors (see grid above). Continuous textures lead to sharper looking images that might border on “boxy”/pixelated.
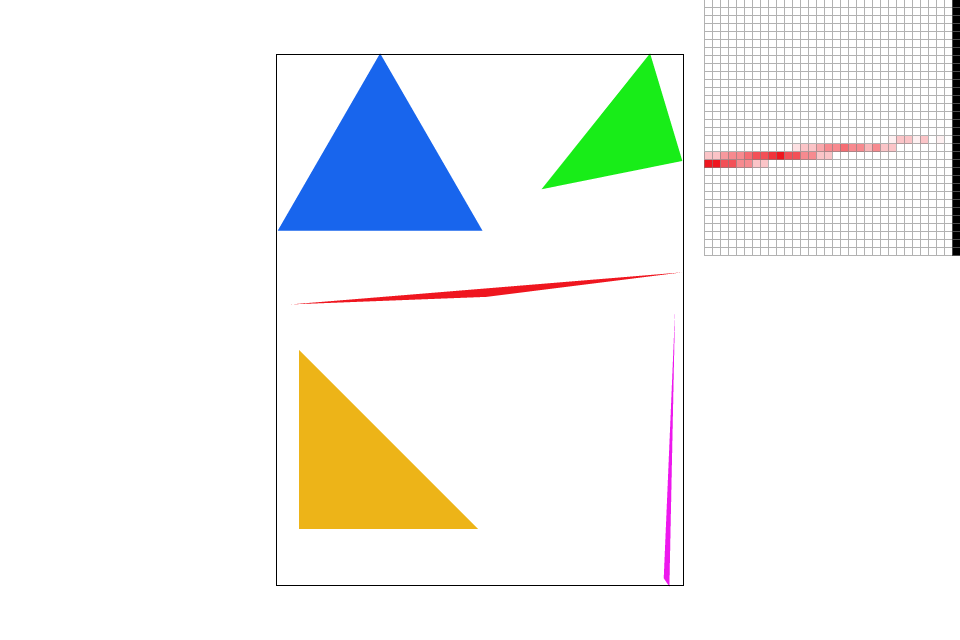
Nearest pixel sampling with nearest level sampling: Nearest level sampling is slightly more computationally heavy (and thus slower) since it needs to calculate the approximate mipmap level for each pixel. It also has a higher memory requirement because it needs to store all the downsampled versions of a texture as the pixel's nearest appropriate mipmap level may be anywhere. The resulting image will still look slightly boxy; although it will appear more continuous than the previous technique with greater blurring.
Nearest pixel sampling with bilinear level sampling: Bilinear level sampling is the most computationally heavy level sampling method since it needs to interpolate between two levels for each pixel so speed-wise, it’s not particularly fast. This will yield more continuous results, although the lines will still be evident. This level sampling method uses a decent amount of memory since it must store the mipmap levels for each pixel.
Bilinear pixel sampling with level zero level sampling: Memory-wise, this technique is relatively light since it only needs to keep track of one mipmap level. Speed-wise, because we’re interpolating pixel samples, it can be slightly slower. Its antialiasing makes the image’s edges much smoother and can lead to slight blurring.
Bilinear pixel sampling with nearest level sampling: Memory-wise, this technique performs the slower than level zero sampling and approximately the same as bilinear level sampling as it keeps track of all the mipmap levels. Speed-wise, we need to calculate the level for every pixel and round to the nearest level as well as interpolate all the pixel samples which can make it slower than the previous sampling method. This image will look more continuous as the colors tend to fade into each other.
Bilinear pixel sampling with bilinear level sampling: Memory-wise, this technique is relatively heavy since it needs to keep track of all the mipmap levels for each pixel. Speed-wise, it’s also slower since we need to calculate the exact level for each pixel, interpolate, then interpolate within each pixel within the texture itself (total of 7 linear interpolations). This image will appear the most continuous and blurred. It will work well for high frequency images but may result in a blurrier image representation as the edges are averaged and blur into one another.
Even though bilinear/nearest neighbor level sampling leads to higher memory usage, we must keep in mind that the additional memory required is still relatively inexpensive (around 1/3 of the full resolution texture's memory).
My Mistakes: